Friday, March 4, 2011

Movement 1: Pitching From the Stretch (Right Handed Pitcher)


Black shirt is Novice... Blue shirt is Expert


Beginning Stance Phase
-Back leg (Right leg) should be parallel and pressed up against the mound.  At this time the pitchers neck is turned toward the catcher in the transverse plane and on the longitudinal axis as he looks to the catcher for the sign.  The front leg is extended and the pitchers back and shoulders are relaxed and in a comfortable position.


Cues: Stay Relaxed


Preperation Phase
- Once the pitcher has the sign and the correct grip, they will bring the front leg up the mound towards to rubber. At this time, both legs will be parallel and about shoulder width apart. The elbows are flexed and the hands will be at the belly button, together and inside the glove.


Cues: Relax the shoulders, Find your grip inside the glove


Action Phase
- You begin the motion by flexing the left knee and bringing it up towards the hands and adducted into your abdomen.  At the same time, your hands which are still together and inside the glove, raise up towards the chest.  Your right leg is now fully extended and you begin to push off the rubber and drive down the mound for momentum. Your next step is to seperate your hands.  


Cues: Keep hands together
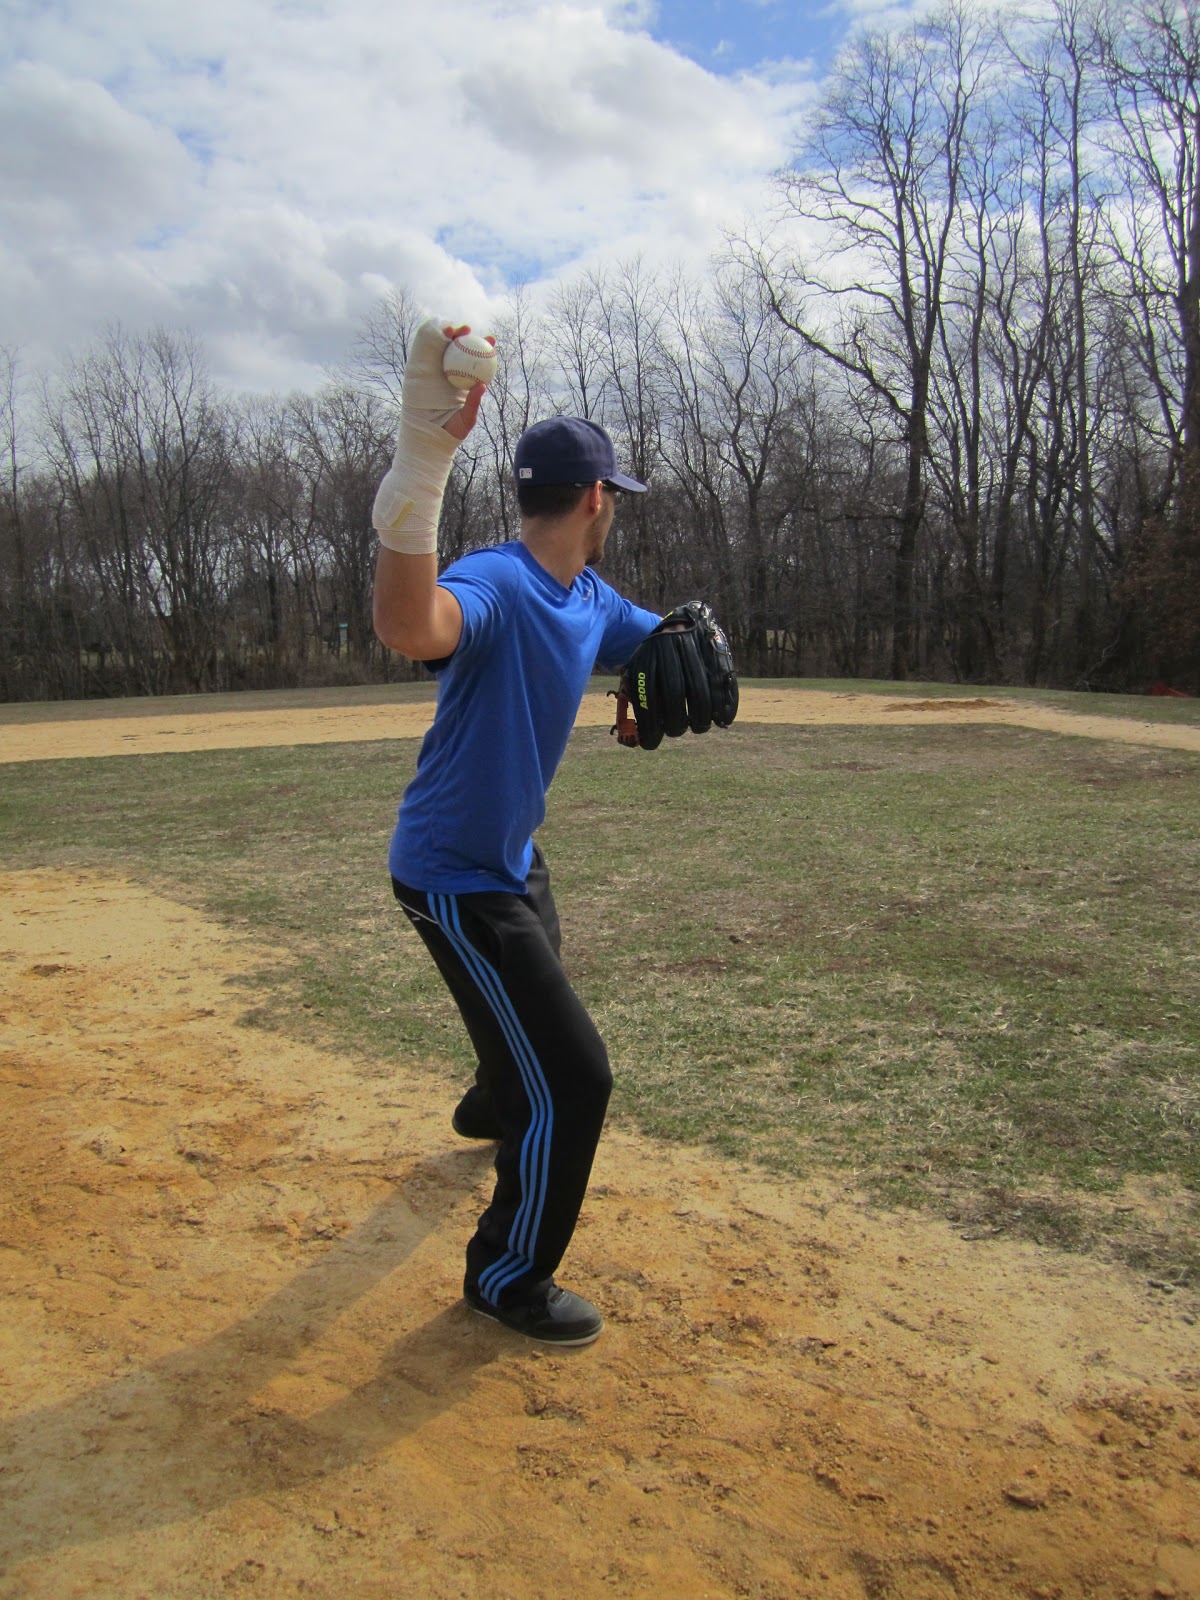


Throwing Phase
Your throwing hand goes back behind the head and forms a 90 degree angle at the elbow.  Your arm should be adducted above the head and your grip should have the ball facing out towards center field.  Your glove hand should be flexed at the elbow with your glove against your left pectoral muscle and your elbow pointing towards the catcher. You are now fully driving down the mound in a rectilinear motion (Straight line).  Your left leg which was flexed and in the abdomen, is now extending towards the catcher.  There is a planter flexion of the left ankle  in the sagittal plane on the mediolateral axis as it hits the ground.  As the left leg touches the ground, the abdomen is using torque to pull the throwing hand down the mound.  You then release the baseball by whipping your arm accross your body.  Your right leg swings around the body due to force and ends up out in front of your  body.


Cues: Glove elbow is bent and pointing towards catcher, Throwing arm bent at elbow and 90 degrees.
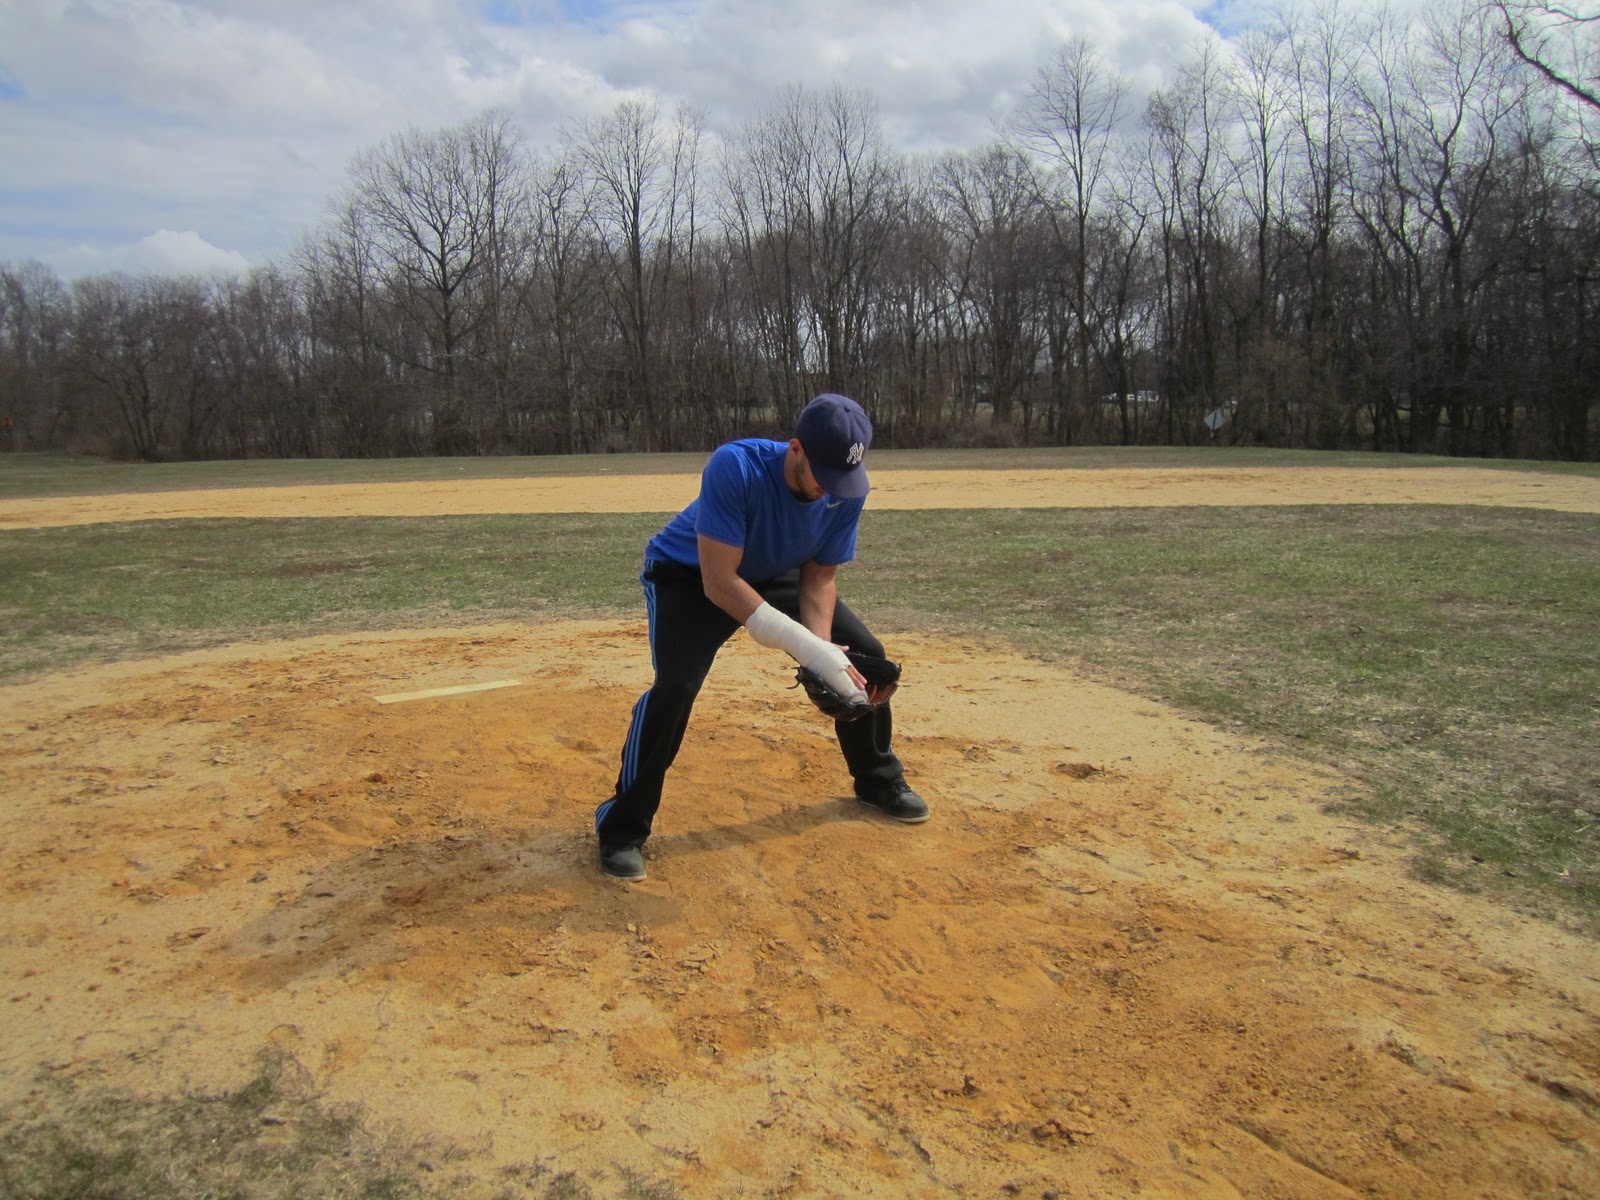


Recovery phase
At this time the ball is thrown and the right leg has rotated around the body.  It is planted in the ground so all you need to do is get into a fielding position so you are ready to field the ball just in case it's hit right back at you.  You make sure both knees flexed and both feet are parallel.  You should be facing the batter with your hands out and your glove on the ground. 


Cues: Get into Fielding Position.


Drill

Leg Lifts

This drill helps pitchers work on their balance, which is very important when pitching.  Without good balance, a pitcher will not throw as hard because their form will be off. This drill will also strengthen the pitchers back leg also known as their "push off" leg since its the leg that drives off the mound. 

 In this drill, the pitcher will set up on the mound as if they are about to pitch from the stretch.  Once they lift their leg, they will hold it at it's highest point for 5-7 seconds then slowly bring it down but without touching the ground.  They will then lift the leg back up again and put it back down two more times.  On their third leg lift, the pitcher will drive down the mound and pitch the ball. 

Movement 2: Fielding a Ground Ball off the Mound


Follow Through on the Pitch Phase
- Pitch the ball and make sure you rotate your back leg around the body and plant it in front of you.


Fielding Position Phase
- Once the ball is pitched, you should automatically be in a fielding position facing the batter.  Both knees should be flexed and you should be in an athletic stance in which you are ready to move laterally to which ever way the ball is hit.  Your glove should be out in front of your body and almost touching the ground.


Cues: Bent knees, straight back, butt down, hands out.


Reaction Phase
- Once the ball is hit you need to shuffle laterally to get in front of it.  Knees remain flexed and both arms remain extended out in front of your body. You are reading the speed of the ball and the hops the ball is taking as you are shuffeling towards the ball.


Cues: Read the ball and approach it. Get in front of it.


Action Phase
- In this phase you are directly in front of the ball and it begins to enter your glove. As you catch the ball with your supinated glove hand, your opposite hand is pronated and covering the ball up to make sure you don't drop it.  You then "funnel" the ball, which means to bring it up into your body.  Your knees are still flexed at this point.


Cues: Funnel Ball into your body.


Throw then Recovery Phase
- Take the ball out of your glove and rotate your body around until you face the base that you want to throw to.  Plant your back foot and make a strong quick throw to the base. If the out is made, you will be getting the ball back so keep an eye on the base runners if there are any.  Look around the diamond and if there is no action, go back to the mound for the next pitch.  


Cues: Rotate hips, Strong Quick throw.


Drill

Get in Front of the Baseball

When fielding a ball hit back towards the pitchers mound, the most important thing is to get in front of the ball and block it from getting past you.  You need a wide base and need to make sure that your chest is over your knees and your hands remain out.  

In this drill two people will be gloveless and will both be in a fielding position with their hands out, head down, knees bent, and butt down.  They will be facing each other.  One person will roll a tennis ball either to the left or right of the other person and that person will need to shift laterally and get in front of the ball to field it cleanly.  Once the person has fielded it, he or she will roll it back to their partners left or right side.  This will be done 20 times each so 40 times total.  each person will get 10 rolls to their left and ten rolls to their right. 

Movement 3: Fielding a Pop-Up off the Mound


Follow Through on the Pitch Phase
-Once you pitch the ball, your back leg needs to rotate around and plant in front of you.


Fielding Position Phase
-After you follow through on your pitch, you should be in a "Fielding Position".  Your knees should be flexed and your glove should be out and extended and ready to field the ball if its hit back towards you.


Cues: Butt down, head down, knees bent, back straight.


Reaction Phase
- Once the ball is hit in the air, your immediate first step is back.  You shift your weight back onto the right leg by bringing it back and bending at your knee. Have good balance, and a good center of gravity as you drop your weight back.   


Cues: Drop back one step.


Action Phase
- Once you react to the ball being hit,  move towards it with your glove in the air. Catch it while it's still above your body. Your knees should be flexed and your arms should be extended up in the air and adducted away from the body.  Make sure you use two hands in order to secure it and prevent an error.


Cues: Get under the ball, Catch with two hands.


Recovery phase
- Once the ball is seccurely in your glove and the out is made, make sure to look around the field to check on the base runners.  You need to quickly turn to every base just in case a runner forgot to go back to the base or if they are tagging up and trying to advance to the next base. If there is no action, return to the mound for the next pitch.


Drills

Blindside Pop Up Drill

In this drill the pitcher will be on the mound but facing center field.   The partner will be standing at home plate with the baseball.  When the person at home plate yells "Up" that means he threw the ball high into the air.  The pitcher will need to react, quickly turn around and locate the ball.  He will then need to get under it with their glove in the air and catch it cleanly.  This drill will be done 10 times  then the partners will switch.


Vocabulary List

Parallel- Located accross from eachother and in the same plane 
Balance- Ability to control the posture of the body during an unorthodox position
Center of Gravity- Point around which a body's weight is equally balanced in all directions 
Mass- Quantity of matter composing a body
Weight- Attractive force that the earth exerts on a body
Inertia- Tendency to resist change in a state of motion
Force- A push or a pull
Rotation- Circular movement of an object around a center point or axis
Flexion- Bending movement that decreases the angle between to limbs or parts
Plantar Flexion- Foward flexion of the foot at the ankle joint.
Extension- A movement of a joint which results in an increased angle between bones or body surfaces at a joint.
Pronation- Inward rotational movement of the forearm
Supination- Outward rotational movement of the forearm
Saggital Plane- Plane in which forward and back movements occur 
Frontal Plane- Plane in which latteral movements occur
Transverse Plane- Plane in which rotational movements occur
Mediolatteral Axis- Axis around which saggital plane movements occur
Anteroposterior Axis- Axis around which frontal plane movements occur
Longitudinal Axis- Axis around which transverse plane movements occur
Abduction- Movement which draws a limb away from the body
Adduction- Movement which brings a limb closer to the body
Linear- Motion along a line
Rectilinear- Motion along a straight line
Torque- The rotary effect of force
Momentum- The product of the mass and the velocity of an object